


by iz7auh
by Roberto


![]() Raspberry, tutorial, wires-x, yaesu, ysf, YSFReflector
Raspberry, tutorial, wires-x, yaesu, ysf, YSFReflector
 Carissimi amici, tra le tante sperimentazioni svolte in questi mesi mi sono divertito a creare due YSFReflector, rispettivamente IT C4FM SUD / ITALY-SUD DTMF 12624 (http://c4fm-italy-sud.iz7auh.net/YSFReflector-Dashboard/) e IT C4FM PUGLIA / C4FM Puglia Italy DMTF 14115 (http://c4fm-puglia.iz7auh.net/YSFReflector-Dashboard/index.php) questi due YSFReflector non sono attualmente interconnessi alle Room Wires-X ufficiali, in quanto è necessario di idoneo hardware, di cui vi parlerò in un altro articolo, la loro messa in attività è puramente a scopo di sperimentazione e spero che possano essere utili in un futuro per essere utilizzati dai sistemi MMDVM .
Di seguito vi spiego step2step come realizzararne uno, potete usare un sever Cloud oppure un semplicissimo Raspberry. Buona lettura!
# sudo su

# apt-get update

# apt-get upgrade

# apt-get install git git-core

# apt-get install build-essential

apt-get install g++-4.7 (skip this step on Debian 8.x)
Installare il chkconfig, il gestore dei servizi runlevel
# apt-get install chkconfig
Scaricare una copia del pacchetto
# git clone https://github.com/g4klx/YSFClients.git

# cd YSFClients/YSFReflector

# make clean all

# nano YSFReflector.ini
Modificare il contenuto del file:
[General]

Daemon=1

[Info]

# Remember to register your YSFReflector at:

# https://register.ysfreflector.de

Name=NOME YSFReflector

Description=DESCRIZIONE YSF

[Log]

# Logging levels, 0=No logging

DisplayLevel=1

FileLevel=1

FilePath=.

FileRoot=YSFReflector

[Network]

Port=42000

Debug=0
Affinché i YSFReflector venga avviato come demone all’avvio è necessario creare un utente mmdvm:
# groupadd mmdvm
 # useradd mmdvm -g mmdvm -s /sbin/nologin
Creare il file che verrà avviato al boot:
# nano /etc/init.d/YSFReflector.sh
Copiare il seguente codice:
#!/bin/bash

### BEGIN INIT INFO

#

# Provides:             YSFReflector

# Required-Start:       $all

# Required-Stop:

# Default-Start:        2 3 4 5

# Default-Stop:         0 1 6

# Short-Description:    Example startscript YSFReflector


#

### END INIT INFO

## Fill in name of program here.

PROG="YSFReflector"

PROG_PATH="/usr/local/bin/"

PROG_ARGS="/etc/YSFReflector.ini"

PIDFILE="/var/run/YSFReflector.pid"

USER="root"


start() {

      if [ -e $PIDFILE ]; then

          ## Program is running, exit with error.

          echo "Error! $PROG is currently running!" 1>&2

          exit 1

      else

          cd $PROG_PATH

          ./$PROG $PROG_ARGS

          echo "$PROG started"

          touch $PIDFILE

      fi

}


stop() {

      if [ -e $PIDFILE ]; then

          ## Program is running, so stop it

         echo "$PROG is running"

         rm -f $PIDFILE

         killall $PROG

         echo "$PROG stopped"

      else

          ## Program is not running, exit with error.

          echo "Error! $PROG not started!" 1>&2

          exit 1

      fi

}


## Check to see if we are running as root first.

## Found at

## http://www.cyberciti.biz/tips/shell-root-user-check-script.html

if [ "$(id -u)" != "0" ]; then

      echo "This script must be run as root" 1>&2

      exit 1

fi


case "$1" in

      start)

          start

          exit 0

      ;;

      stop)

          stop

          exit 0

      ;;

      reload|restart|force-reload)

          stop

          sleep 5

          start

          exit 0

      ;;

      **)

          echo "Usage: $0 {start|stop|reload}" 1>&2

          exit 1

      ;;

esac

exit 0

### END
Salvare il file e renderlo eseguibile:
# chmod 755 /etc/init.d/YSFReflector.sh
Copiare il file eseguibile YSFReflector nella cartella “/usr/local/bin/”
# cp YSFReflector /usr/local/bin/YSFReflector
Copiare il file YSFReflector.ini in /etc/
# cp YSFReflector.ini /etc/YSFReflector.ini
Creare il servizio di runlevel per YSFReflector digitando:
# chkconfig YSFReflector.sh on
Per avviare il demone:
# /etc/init.d/YSFReflector.sh start
Per arrestare il demone
# /etc/init.d/YSFReflector.sh stop
Per riavviarlo
# /etc/init.d/YSFReflector.sh reload
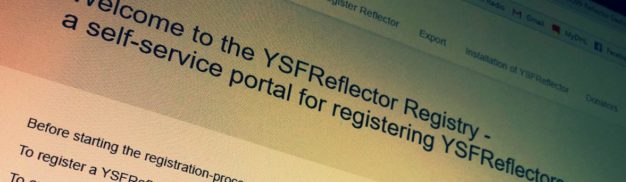
Abbiamo terminato l’installazione, adesso bisogna registrare il Reflector creato online all’indirizzo: https://register.ysfreflector.de/register seguendo le linee guida su come registrarlo presenti a questo link https://register.ysfreflector.de/conventions
Ricordarsi di aprire sul proprio router o se si è su server cloud con iptables il traffico TCP/UDP sulla porta utilizzata nel file YSFReflector.ini
Buon Divertimento!
73 de IZ7AUH Frank
![]()
![]()

![]()
